Note : Remember to adjust any Modifiers before initiating the Scan.
After logging in, you’ll be located at CYTRIX Dashboard , the Platform’s “main page”. In the left part is the main menu, please expand the “Scan” sub-menu and click on “New Scan” :

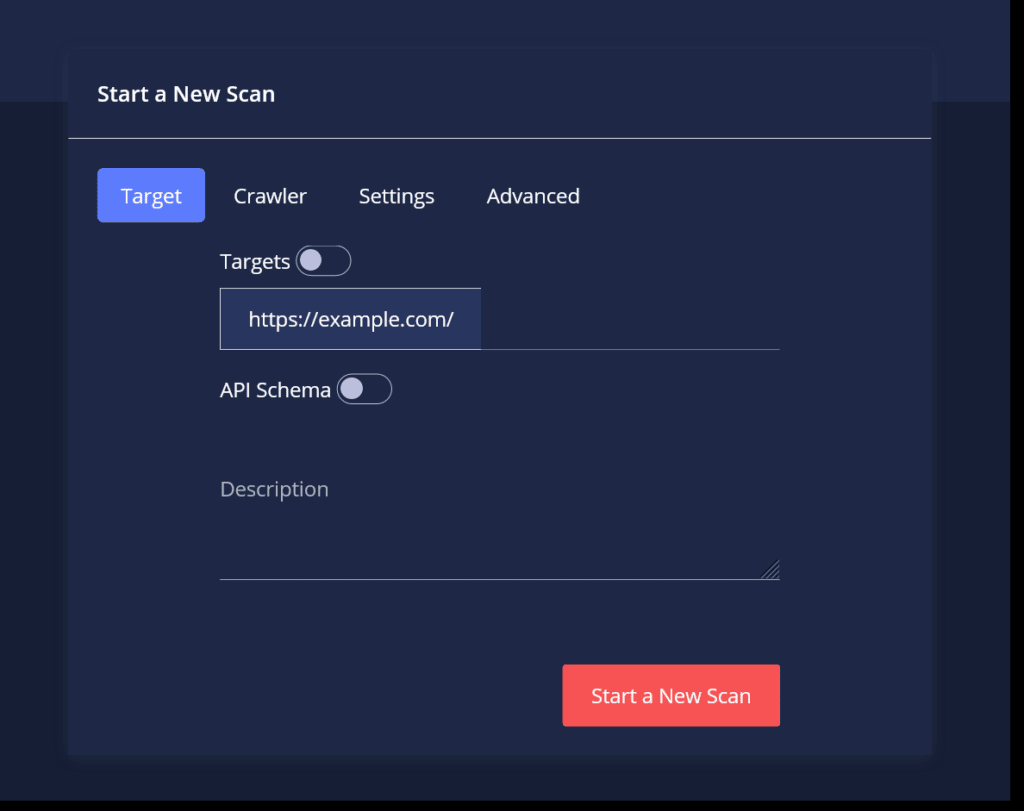
In the “Start a New Scan” window, you can observe all of the options you have in order to set and modify your scan :

In the displayed screen, you may start a New Scan and add a Description for it.
To learn more about API Schema.

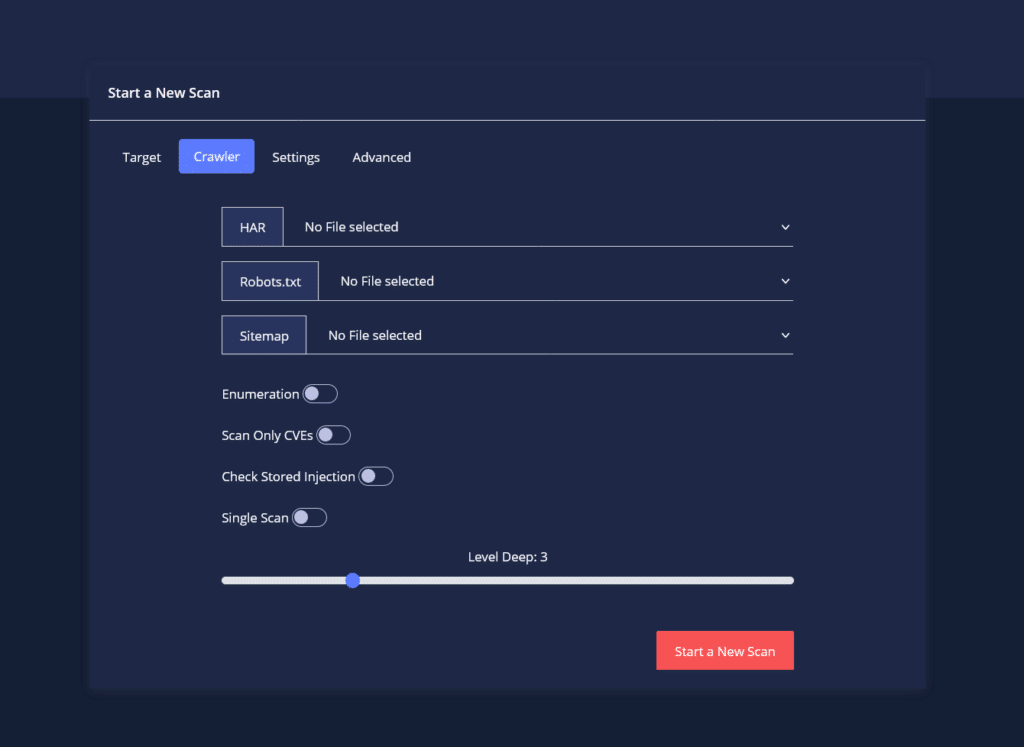
- CYTRIX is capable of ingesting HAR files to perform deeper crawling activity against your web assets.
HAR – short for HTTP Archive, is a format used for tracking information between a web browser and a website, doing so, will “Assist” CYTRIX in performing a more efficient Scan.
- Robots.txt – in case the site has a robots.txt which shows which URLs are allowed and which aren’t.
- Sitemap – an .xml file which documents URLs found in the website and when were they last updated.
- Using Enumeration – by enabling it, CYTRIX will begin “Brute Forcing”, overloading the server and will start “Inserting” random Parameters and Paths for testing,
Pay attention – enabling Enumeration will Significantly extend the Scan’s Duration.
- Scan Only CVEs.
- Check Stored Injection – enabling it will allow CYTRIX to search for Stored Injections.
- The “Level Deep” gauge is responsible for determining the depth of the Scan in the website, or in other words, how many files and directories related to it will be scanned. By using the “Single Scan” option only the given page will be scanned, without taking into account other pages related to it, doing so, will disable the “Crawler”.

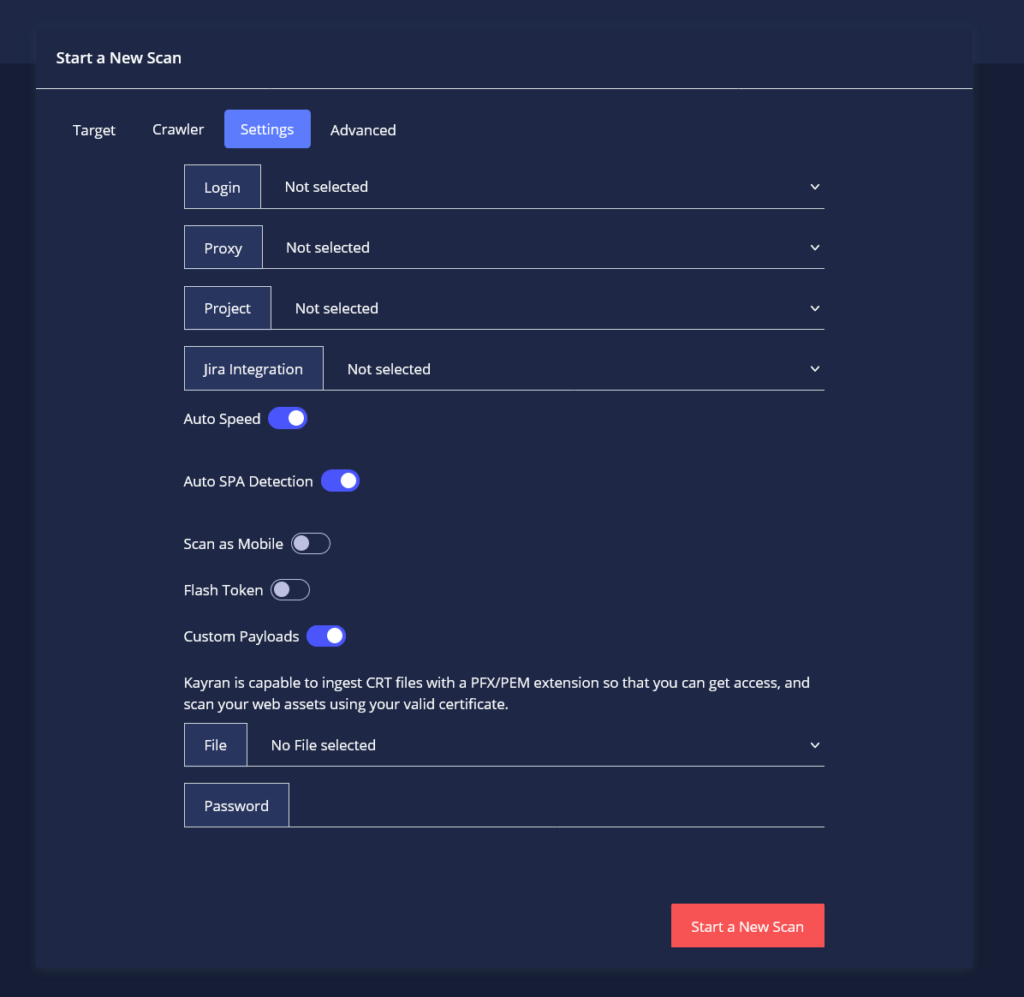
Settings tab modifiers –
- If there is a need to use a certain Login Profile or\and a Proxy you can pick the setup that you want in the Settings window, please make sure to load the Login Profile (you created via the “Login Authentication” section).
- Project – to attach the scan/s to a certain Project (you created via the “Projects” section).
- Jira Integration – connecting the scan to a certain Jira connection.
- Controlling the Speed affects CYTRIX’s behavior during the Scan, we recommend leaving “Auto Speed” enabled since CYTRIX will calculate resources Dynamically, and “Shift down/up” respectively.
- Auto SPA Detection – the option of allowing CYTRIX to automatically determine if the scanned target is based on a SPA configuration or not (for more information, go here).
- Scan as Mobile – initiate the scan as if you are using a mobile device (some functions in the site might work/not work for mobile devices).
- Flash Token – In case that you wish to indicate that your site uses a ‘Refresh Token’. That site will be defined as an SPA.
- Custom Payloads – in case Users would like to use Payloads they have created.
- CRT – in case Users need to use a certain Certificate in their Scan.

Advanced tab modifiers –
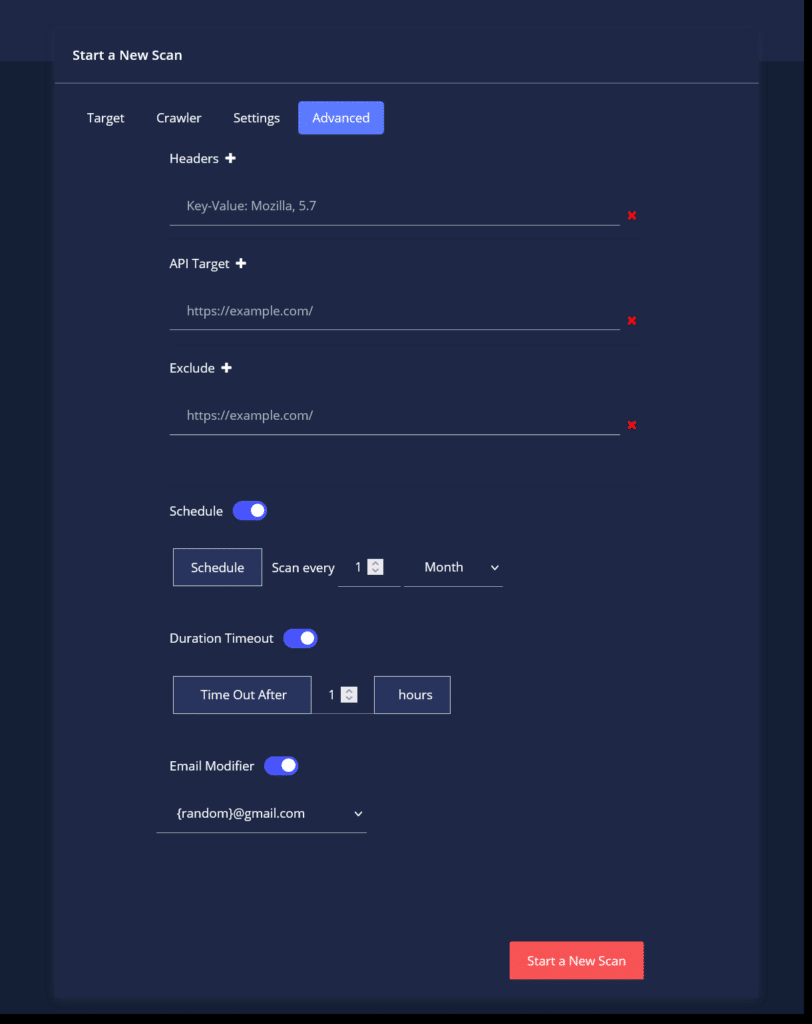
The Advanced tab gives you the option to use more advanced features that CYTRIX possess such as :
- Using crafted Headers in your scan.
- Adding an API Target in order to test the APIs your web assets are connected to (please notice that this isn’t scanning the URLs as a target, this allows CYTRIX to test vulnerabilities between your web asset to the API it’s communicating with).
- Excluding specific Path or File, so that the Scan will leave them out.
- Duration Timeout – scans that will be stopped after a given time (for more information, go here).
- Email Modifier – learn more about it here.

- You can also use the ‘Schedule‘ option, which allows you to create a pre-scheduled scan, based on your preferences.
If you would like to schedule your scan, make sure to turn the ‘Schedule’ option on and pick your desired scan periods.
Note : Entering a negative time coefficient (0 or <0) will result in the scan not being initialized.

You also have the option of adding new Headers, Excluded Domains and New API Targets (by clicking on the “ + ” next to it) :

